Domoticz: Difference between revisions
No edit summary |
No edit summary |
||
| (17 intermediate revisions by the same user not shown) | |||
| Line 1: | Line 1: | ||
How to install Domoticz | == How to install Domoticz == | ||
Linux/Ubuntu/Raspberry: | Linux/Ubuntu/Raspberry: | ||
| Line 22: | Line 22: | ||
</pre> | </pre> | ||
After both application is intalled you can open the Domotizc page at your Raspberry s IP http://raspberrypi.local:8080 | After both application is intalled and the Avahi is running you can open the Domotizc page at your Raspberry s IP http://raspberrypi.local:8080 | ||
== First time config == | |||
=== Add a Mqtt gateway first === | |||
When open first time the Domoticz go to the '''Setup''' -> '''Hardware''' page and add a '''MQTT Client Gateway with LAN interface''': | |||
[[File:Add_mqtt.png|800px]] | |||
'''With name: ''LocalMosquitto''''' | |||
'''Remote address: ''localhost''''' | |||
'''Port: ''1883''''' | |||
'''IMPORTANT: The data timeout left disabled, because the Domoticz will be very-very unstable if enabled that''' | |||
=== Add a Dummy device === | |||
[[File:Add_dummy.png|800px]] | |||
Select the type: '''Dummy (Does nothing, use for virtual switches only)''' | |||
Add a name: ex Dummy | |||
and '''Add''' the device. | |||
=== The first temperature sensor === | |||
To connect the [https://www.iot4.eu/?product=iot4sh01ds IOT4SH01DS] temperature sensor: | |||
[[File:Add_virtual_temp.png|800px]] | |||
Write a '''Name''', and select the '''Sensor type''' to '''Temperature''' | |||
'''IMPORTANT: If you want use with Siri the sensors or switches use name which can say on the Siri's language ex.: use Living room not the hungarian Nappali''' | |||
=== The first switch === | |||
To use the [https://www.iot4.eu/?product=iot4sh01relay IOT4SH01Relay IOT4SH01Relay] Wifi switch: | |||
[[File:Add_virtual_switch.png|800px]] | |||
Write a '''Name''', and select the '''Sensor type''' to '''Switch''' | |||
'''IMPORTANT: If you want use with Siri the sensors or switches use name which can say on the Siri's language ex.: use Living room not the hungarian Nappali''' | |||
=== Set the device idx === | |||
On the '''Setup'''-> '''Devices''' page, you can check what was the new devices '''idx'''. In the idx column. | |||
[[File:Devices.png|800px]] | |||
This idx need to setup in the device configuration page '''Domoticz''': | |||
[[File:Device_domoticz.PNG|400px]] | |||
When set this field need to push the Update button in the config page and you can go back the Domoticz temperature page and will see the actual values from the sensor. | |||
[[File:Temperature.png|800px]] | |||
Latest revision as of 12:35, 17 April 2017
How to install Domoticz
Linux/Ubuntu/Raspberry:
Just simply copy this command:
sudo curl -L install.domoticz.com | bash
After this install latest the Mosquitto MQTT broker:
add-apt-repository ppa:mosquitto-dev/mosquitto-ppa
sudo apt-get update
sudo apt-get install mosquitto mosquitto-clients python-mosquitto python3-mosquitto libmosquitto-dev libmosquitto1 libmosquittopp-dev libmosquittopp1
The Mosquitto broker add yourself into the startup list in under the installation.
Very usefull if you install the Avahi daemon to get your Raspberry's .local name:
sudo apt-get install avahi-daemon
After both application is intalled and the Avahi is running you can open the Domotizc page at your Raspberry s IP http://raspberrypi.local:8080
First time config
Add a Mqtt gateway first
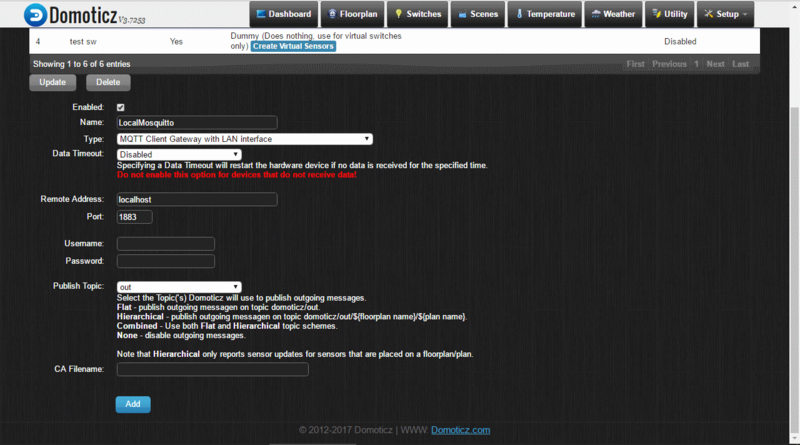
When open first time the Domoticz go to the Setup -> Hardware page and add a MQTT Client Gateway with LAN interface:
With name: LocalMosquitto
Remote address: localhost
Port: 1883
IMPORTANT: The data timeout left disabled, because the Domoticz will be very-very unstable if enabled that
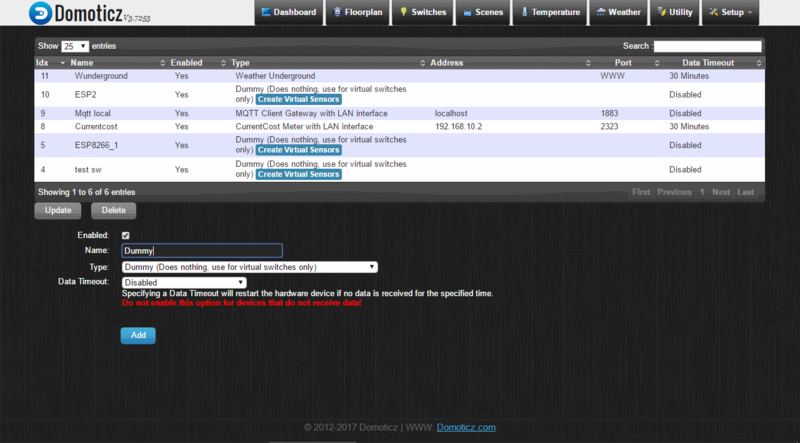
Add a Dummy device
Select the type: Dummy (Does nothing, use for virtual switches only)
Add a name: ex Dummy
and Add the device.
The first temperature sensor
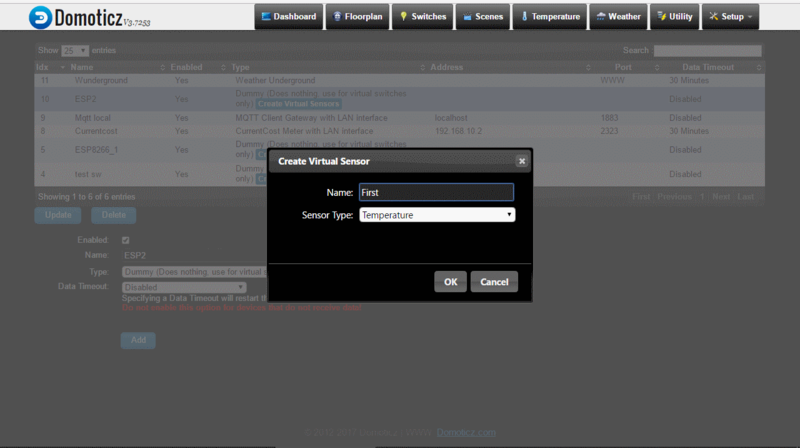
To connect the IOT4SH01DS temperature sensor:
Write a Name, and select the Sensor type to Temperature
IMPORTANT: If you want use with Siri the sensors or switches use name which can say on the Siri's language ex.: use Living room not the hungarian Nappali
The first switch
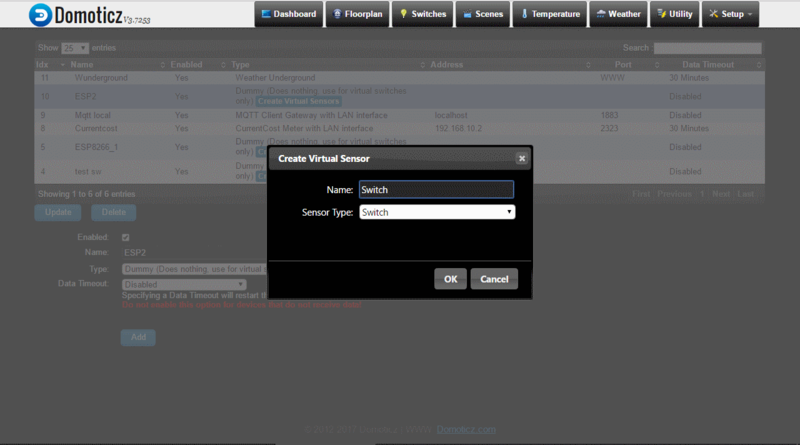
To use the IOT4SH01Relay IOT4SH01Relay Wifi switch:
Write a Name, and select the Sensor type to Switch
IMPORTANT: If you want use with Siri the sensors or switches use name which can say on the Siri's language ex.: use Living room not the hungarian Nappali
Set the device idx
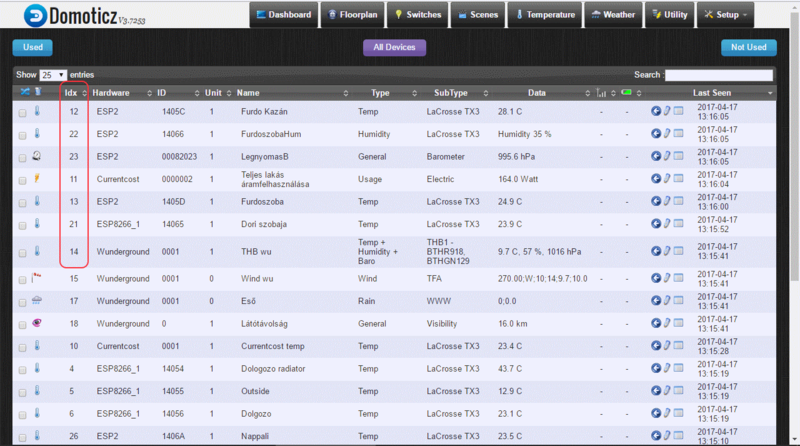
On the Setup-> Devices page, you can check what was the new devices idx. In the idx column.
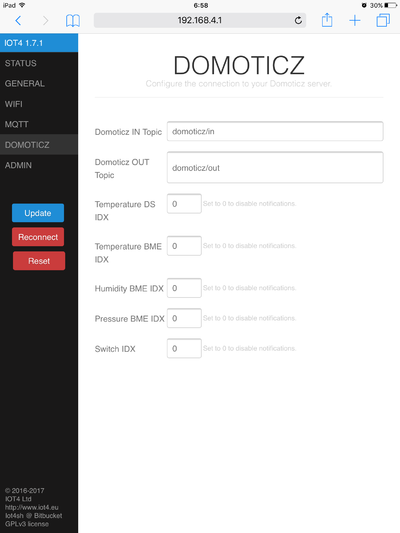
This idx need to setup in the device configuration page Domoticz:
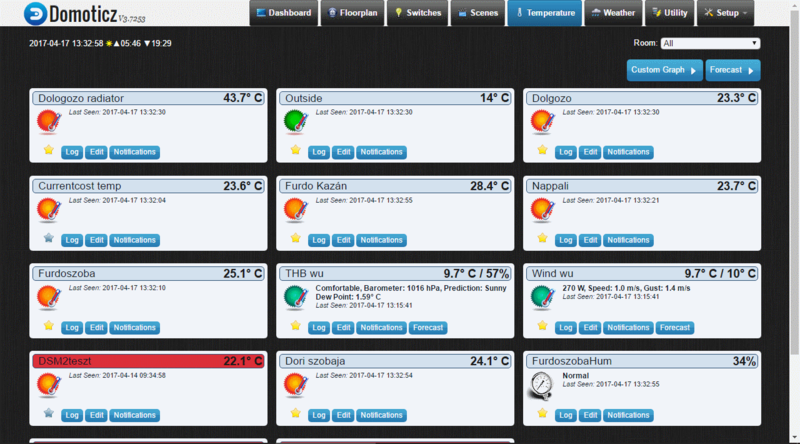
When set this field need to push the Update button in the config page and you can go back the Domoticz temperature page and will see the actual values from the sensor.
